Home       About Us       Salsa Store       Referral       Lifebooks       Recipes       Videos       Blog Headers
Showing posts with label Crafts. Show all posts

Monday, June 27, 2011

A quick, cute 4th of July banner

TubaDad is in Germany on business right now*, so the girls and I have been keeping busy with lots of water play and fun crafts like today’s so-easy-a-five-year-old-could-do-it 4th of July Banner.DSC_7160LR6

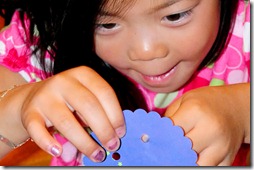
It was Ro’s night to stay up late (we alternate every night so we get some one-on-one time with each girl and also so they go to sleep separately instead of partying together until the wee hours of the morning). So we broke out the new scallop circle punch and festive patriotic papers we picked out at Michael’s and made a fun 4th of July banner!DSC_7151LR

DSC_7092LR3We punched out five scallops from each color, made a couple of holes in each one with a regular hole punch, then threaded the circles onto a long piece of twine. That was it! (Hint: I wrapped a little scotch tape around the end of the twine so it was easy to thread.)DSC_7097LR

Ro had a ball with this project and loved the fact that she got to do it all by herself (well actually I helped position the paper in the punch because I only bought one sheet of each color and we couldn’t afford to mess them up, but still...).

We didn’t use any glue or knots, just dragged the scallops into place and the thick twine held them neatly in position.

She was SO PROUD of the finished banner.

DSC_7120LRDSC_7136LR5

I think it’s pretty dang cute too. Good thing, because as soon as Ree spies this in the morning, we’ll be making another one.

Happy crafting!

Update from Tuesday: I was right, Ree wanted to make one as soon as it was her turn to stay up late. So now we have two. I like how they made different patterns with the colors. Now they want to make a few banners for their room, so we’re heading back to Michael’s today so they can pick out a few sheets of paper that match their room colors. It’ll be interesting to see what they put together.DSC_7212LR

* And he is actually going to the zoo tomorrow with Ro and Ree’s awesome twin buddies H2 and S2 who happen to be visiting Germany this very second. The girls CANNOT WAIT to see pictures.

Friday, June 24, 2011

Homemade moon sand (another fun summer project)

DSC_6995LRThe girls have been dying to try this Homemade Moon Sand recipe that I found on Pinterest, so yesterday we gave it a whirl and found that it was fun and easy! (Oh, before I forget, I added Kid Projects to the nav bar at the top of this site if anyone needs ideas like this one.)

Directions: combine 4 cups of sand, 2 cups of cornstarch, and 1 cup of water, then play using your hands, cookie cutters, small kitchen utensils, or anything else you can dream up. Add more water, a little bit at a time, to get the consistency you want.

That’s it! Really. The stuff was great.

DSC_7002LRDSC_7038LR

It behaved like doughy wet sand that holds its shape really well. The girls really liked using cookie cutters (just pack the moon sand in the cookie cutter and smooth the top, then poke it out of the cookie cutter). They played with it for almost two hours (!!!). And when it got a little dry from being loved half to death, we just added a little more water and kept going.DSC_7010LRDSC_7031LR

If you put it out in the sun, it dries whitish and kind of hard too (this discovery was a happy accident that elicited a little bit of squealing).

This project would best be done outside, but it was about 8000 degrees in the sun yesterday, and I couldn’t take it. So we put some containment towels on the kitchen floor and went to town with the moon sand in the nice cool house. Cleanup actually wasn’t too bad at all, just sent the girls outside to hose down their hands and the implements (you know they enjoyed that) and wiped down the art table and swept up any stray sand while they were hosing. Now that I’ve seen how easy the project was, I’d let the kids do it on their own on the outside picnic table and there wouldn’t be a lick of cleanup.

Happy crafting!

Thursday, June 23, 2011

Tissue-paper bowls (a fun summer project)

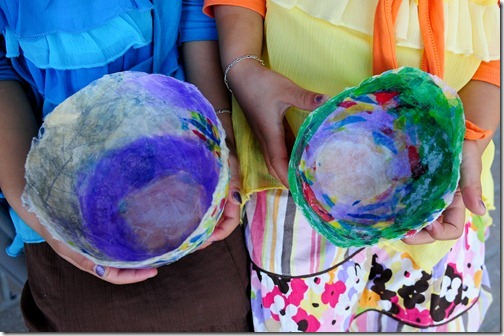
DSC_7053LRNow that the girls are out of school, we’ve been getting our crafty on with a fun summer project every day. They love getting messy and creative (and I love the longer projects that give me a minute to sit down!). One of our projects this week was the tissue-paper bowl, and we’re really happy with the results.

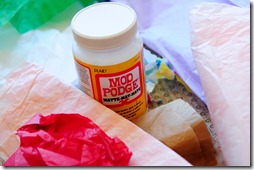
DSC_6910LRTo make your own, you’ll need a bowl (to use as the mold), saran wrap, cooking spray, tissue paper in a variety of colors (we grabbed whatever was lurking at the bottom of the gift-wrapping box), Mod Podge, and a brush.

Cover your bowl with saran wrap then spray it with cooking spray so it’s nice and slimy:DSC_6882LR

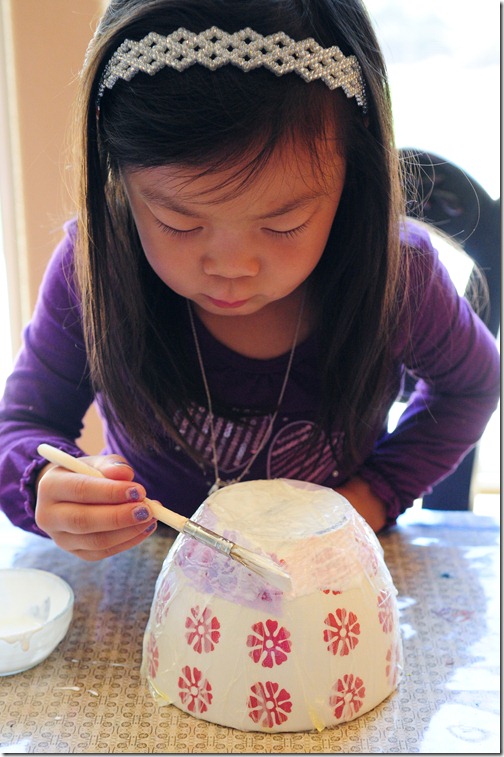
Put small, ripped pieces of tissue paper all over the bowl using Mod Podge as the glue. Make sure that each piece also gets a top coat of Mod Podge. (I just realized that I’ve been saying the name wrong for decades, by the way – I have alwaysalways called it Modge Podge. Hm.):
DSC_6897LRDSC_6902LRDSC_6900LR

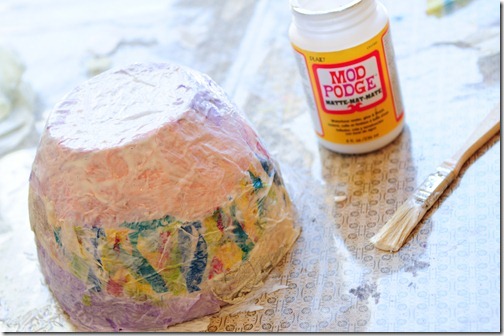
Keep doing this over and over until you have four to five layers of tissue paper. Here’s what it looks like wet:
DSC_6912LR

DSC_6914LRLet everything dry. (We put our bowls out in the sizzling-hot California sun – it’s a cooker this week.) Put on more tissue paper and let dry again if there are any thin areas – our red-flowered bowl pattern still showed through in a few areas below, so we repeated the layering and drying until everything was all covered.

Then gently pry off the bowl and the saran wrap, trim any jaggedy edges, and you’ve got a cute tissue-paper bowl. The finished bowl will be delicate and bendy (see Ro’s below where she’s squishing it slightly):DSC_7047LR

When you’re all done, you can also put a coat of Mod Podge on the inside to make everything extra shiny. (We haven’t done that in these pictures.) Cheers!

PS: I just put our whole list of Kid Projects up above in the nav bar, so click on it and have some fun!

Tuesday, June 14, 2011

Sidewalk chalk paint

Psst, does anyone else think that summer days without school can be loooooooooong? Oh man, tell me I’m not the only stay-at-home mom who has ever looked at the clock at noon and thought “Really????? That’s it????” Today by that time, we had already read a bunch of princess books, cleaned up the playroom, made juice popsicles, painted some wooden dolls, done hair three times, done a load of laundry, played on the Slip N Slide, finished a summer project (twice), torn through and then cleaned up the dress-up area, had an outdoor lunch, and dabbled in the water table. Yup. Then we went on to swim lessons, the library, and the grocery store. By that time I was well and thoroughly cooked and gave the still-peppy girls tv dinners in front of a nice, long movie. Ahhhh.

Anyhow, our summer project today was homemade sidewalk chalk paint, and it was a big hit. We’ll definitely be doing this one again.

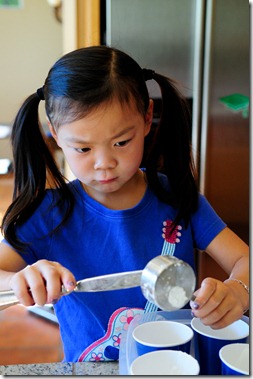
How to make your own sidewalk chalk paint: Get a bunch of cups (we used leftover paper cups from the grad party) and put them in something that will keep them from spilling (in our case, a large tupperware was perfecto). Put 1/4 cup of cold water and 1/4 cup of cornstarch in each cup. Then add a few drops of food coloring to each cup and stir gently.

That’s it. You’ve got sidewalk chalk paint and the kiddos can use old paintbrushes to create (washable) masterpieces on your patio.

As always, these little babes are quite serious about their crafting. Quite:DSC_6673LRDSC_6676LRDSC_6714LR

It cracks me up how they watch each other so intently. The twin stink eye rivals any quality-control system I’ve ever seen:DSC_6691LRDSC_6707LRDSC_6713LRDSC_6729LRDSC_6738LR

They can (and do) crouch like this for hours. If I tried to do this I’d be in traction:DSC_6758LR

Fun stuff:DSC_6768LR

Can you read what they wrote?:DSC_6805LR

Oh yeah, we’re splattered and we’re sassy:DSC_6782LR

Tomorrow Ro and Ree are trying out a new camp called Steve & Kate’s, and if they like it we’ll make it a twice weekly adventure. Has anyone tried it before? It sounds really neat.

Wednesday, April 27, 2011

How to make tissue-paper flowers

Quite a few folks asked about the big tissue-paper flowers we had hanging from the ceiling during the Bunny Bash. They were homemade, and are easy to make once you know how. Each flower takes about five to eight minutes (depending on how speedy you are). Here are the instructions and a few tips I learned along the way:

Materials for each flower:
8 sheets of 20x30” tissue paper, thin wire, scissors, fishing line

Tip: Buy 20x30” sheets of tissue paper (like the size they sell at Target or Amazon.com). DO NOT try to make these flowers with the smaller 20x20” tissue paper that most stores sell (like Walmart, Michael’s, Diddams, and Party City) or your flowers will be misshapen, lopsided, and generally crappy looking and you will think that you are terrible at crafts and doing something wrong. (And you will have to beg your poor friend Maggie to get back in the car after already wasting an hour struggling with the small paper and drive to four more stores looking for bigger tissue paper, and then you will have to pour a glass of wine to relax before starting again.)

Alrighty, stack eight sheets of 20x30” tissue paper and fold the stack accordion style into 1.5” folds. Maggie and I found that it was fun to do some flowers all in one color, some in two colors, and some in three colors. The variety looked nice once they were hanging:DSC_4502LR

Cinch the middle together with a piece of wire (a twist tie will do in a pinch) and then twist the ends of the wire to make a loop for hanging.

Cut both ends of your tissue so the edges are rounded. (Any good pair of scissors we have in this house is immediately used in the garage or to cut chalk or dirt or something else unsavory, so our scissors are all dull and we had to basically saw through the paper. Whatever... it worked.)DSC_4505LR

Gently pull each piece of tissue paper away from the center. If you pull too hard the paper will rip, but you can repair any rips with a tiny piece of scotch tape. Everything is ok, just breathe, take a sip of wine, relax, and keep going:DSC_4507LR

Another rip? Where’s that damn tape?:DSC_4513LR

It’s best to hang the flowers immediately after fluffing them, or they’ll start to settle, plus your husband will be a little cranky that massive piles of tissue paper are covering every surface in your kitchen:DSC_4512LR
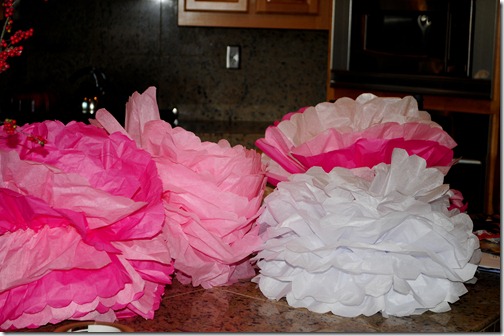
Don’t they look all purdy hanging up there? I used fishing line for the hanging, by the way:DSC_4515LRDSC_5031LR_decorations

I hung them at varying heights from all the recessed lighting cans in the kitchen and also from the center bar in the outside craft tent:IMG_1496MaggieLR

Also, this is one of the rejected flowers made from the too-small tissue paper. It was completely bare on one side and I just couldn’t get it to work, so I started to crunch it up and throw it away, then realized it didn’t look half bad when smooshed together and only seen from the top. So I jammed it in an Easter basket and called it done.DSC_5022LR_decorations

So there you have it. Tissue Paper Flowers.

~~~~~~~~~~~~~~~~~~~
SpringFling_thumb2_thumb1Post #27. A few people pointed out that even a post saying I’m not feeling well enough to post counts, which is good enough by me! So, for the record, yesterday’s “non-post” is going to be #26 and this is #27. Check out these other spring fling bloggers: And babies make four…, Another Journey, Birdie and the Queen Bee, Catherine’s Chatter, Diary of a Nouveau Soccer Mom, Dragonflies, Journey to Motherhood, Koprowski Kids, Life with L and M (julialaine.net), Love and a Little Craziness, Mindful of Mine, Moments with Maisie, No Ordinary Family, One Plus One Equals Four, Our Boy and His Cricket, Searching for Sophie, Spectacular S, Three Kids = Chaos, To Vietnam and China, We’re Here.

Friday, April 22, 2011

Peeps in a paper bag nest (one last Easter craft)

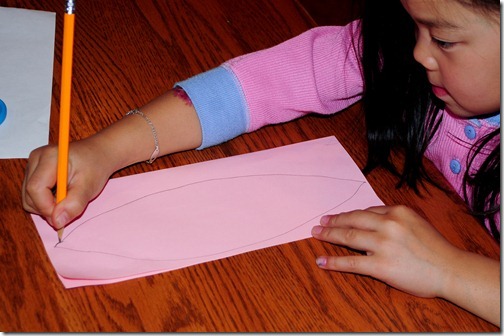
The final craft we’ll have at the kids’ table for Sunday’s egg hunt is one I made up. I just had this picture in my head of using peeps and a nest the kids could make themselves, but couldn’t find anything quite right. So I grabbed an idea I’d seen for a paperbag nest and modified it to be all Eastery. Here are the printable instructions that will be on our craft table (feel free to click and print):

Microsoft Word - Peeps in Nests.doc

This craft is super easy and fun, both Ro and Ree were able to do it all by themselves and are pretty dang proud of their little nests. It’s great for a large gathering of kids because there is simply no chance of catastrophic mess.

TubaDad’s folks are in town for the big egg hunt and Ma and I are already hard at work crafting and Pa is hard at work fixing things. I’ll have some cute grandparent pics tomorrow.

~~~~~~~~~~~~~~~~~~~
SpringFling_thumb2_thumb1Post #22 of my Spring Fling 30 posts in 30 days. Thanks for your fun comments!! These great bloggers are also participating in the Spring Fling and are kicking butt with this challenge: And babies make four…, Another Journey, Birdie and the Queen Bee, Catherine’s Chatter, Diary of a Nouveau Soccer Mom, Dragonflies, Journey to Motherhood, Koprowski Kids, Life with L and M (julialaine.net), Love and a Little Craziness, Mindful of Mine, Moments with Maisie, No Ordinary Family, One Plus One Equals Four, Our Boy and His Cricket, Searching for Sophie, Spectacular S, Three Kids = Chaos, To Vietnam and China, We’re Here.

Wednesday, April 20, 2011

Psst, this bunny’s peeking at you (easter craft)

DSC_4759LRWe're going to have a big kids' craft table at the egg hunt this weekend, and Peeking Bunny is one of the crafts that will be set up.

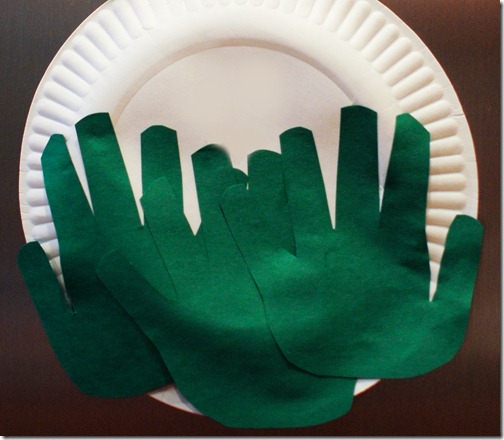
I looked through jillions of crafts online and rejected most of them because they were too hard, or too messy, or the materials were too expensive to do with a crowd. I finally settled on a few ideas that the kids could do mostly (or fully) on their own and this cute bunny peeking through handprint grass (idea from here) was one of the crafts that fit the bill. Yay!

If your kids would like to make their own Peeking Bunnies, here’s what we did on our test run:

1. Grab this stuff:DSC_4767LR

2. Flip your plate “eating side down.” Trace three hand prints, cut them out, and glue them to your plate:DSC_4544LR2DSC_4759LRps

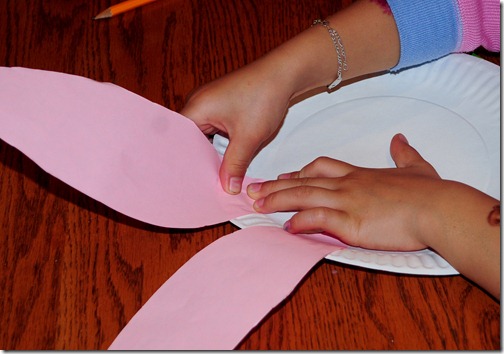
3. Cut out 2 bunny ears and glue them to the back of your plate. Reinforce with tape.DSC_4565LRDSC_4570LR2

4. With a crayon, draw eyes and a nose peeking out of the grass. Finally, don’t forget to write your name on the plate. My sample bun is on the left, and Ro’s is on the right.

DSC_4759LRDSC_4757LR2

Does anyone have any good Easter coloring pages or word searches or that kind of thing? I’d like to put some of those on the crafts table as well.

Happy Easter!

~~~~~~~~~~~~~~~~~~~

SpringFling_thumb2_thumb1Post #20 of my Spring Fling 30 posts in 30 days. Thanks for all the comments, you sure make daily posting fun!! These great bloggers are also participating in the Spring Fling and are kicking butt with this challenge: And babies make four…, Another Journey, Birdie and the Queen Bee, Catherine’s Chatter, Diary of a Nouveau Soccer Mom, Dragonflies, Journey to Motherhood, Koprowski Kids, Life with L and M (julialaine.net), Love and a Little Craziness, Mindful of Mine, Moments with Maisie, No Ordinary Family, One Plus One Equals Four, Our Boy and His Cricket, Searching for Sophie, Spectacular S, Three Kids = Chaos, To Vietnam and China, We’re Here.